How to Create a GitHub Pages Blog with Jekyll on Windows (Setup & Local Preview)
🐹 Create a New Repository for Your GitHub Pages Site
Find a Jekyll Theme Template Search in GitHub OR enter
https://jamstackthemes.dev/ssg/jekyll/, Once you find a theme you like, check the author’s profile or documentation to locate the public template repository.Create a New Repository from the Template For this example, we’ll use the chirpy-starter template. Go to its GitHub page: 1. Click “Use this template” 2. Click “Create a new repository” 3. Name your repository exactly like
<YOU_USERNAME>.github.io(replace<YOUR_USERNAME>with your actual GitHub username). This specific naming convention is required for user/organization GitHub Pages sites. 4. Ensure the repository is set to Public 5. Click “Create repository”Clone the Repository to Your PC
1
 git clone https://github.com/<YOU_USERNAME>/<YOU_USERNAME>.github.io.git
💎 Set Up Your Local Development Environment with Ruby & Jekyll
🛠️ Install Ruby and Bundler
Jekyll was written in Ruby, so the first step is to install Ruby. For Windows users, RubyInstaller is the highly recommended method.
- Download RubyInstaller with DevKit
- Go to the official RubyInstaller downloads page:
https://rubyinstaller.org/downloads/ - Find “WITH DEVKIT” section. Download the latest recommended version (it usually has a marker) like
Ruby+Devkit 3.x.x-x (x64)(e.g., Mine wasrubyinstaller-devkit-3.4.2-1-x64)
- Go to the official RubyInstaller downloads page:
- Install RubyInstaller
- Run the downloaded
.exefile. - During the installation steps, make sure you check these two boxes:
- “Add Ruby executables to your PATH” (Crucial for running Ruby commands easily)
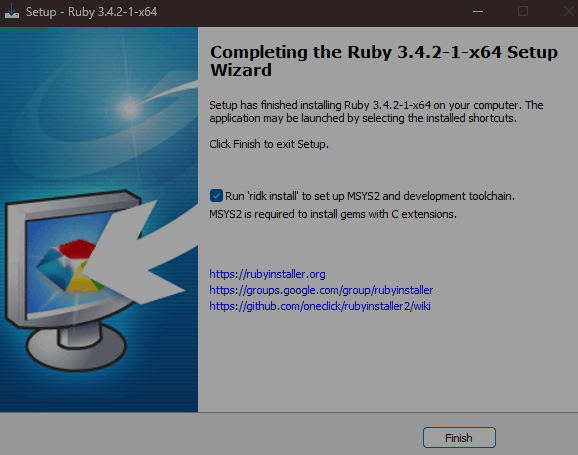
- “Run ‘ridk install’ to set up MSYS2 and development toolchain” (Installs necessary tools for compiling some Ruby gems)
- After the main installation finishes, a command prompt window will pop up asking about MSYS2 installation:
1
2
3
4
5
  1 - MSYS2 base installation
  2 - MSYS2 system update (optional)
  3 - MSYS2 and MINGW development toolchain

  Which components shall be installed? If unsure press ENTER [1,3]
You can usually just press Enter to accept the default selection (typically 1,3). Wait for the installation to complete.
- When you see the following message, the MSYS2 setup is finished:
1
2
3
4
5
6
7
8
9
  Install MSYS2 and MINGW development toolchain succeeded

  You can use 'ridk enable' to activate the MSYS2 tools on the command prompt.

  1 - MSYS2 base installation
  2 - MSYS2 system update (optional)
  3 - MSYS2 and MINGW development toolchain

  Which components shall be installed? If unsure press ENTER []
You don’t need to select anything further here. You can close this command prompt window.
- Run the downloaded
- install Bundler
- Important: Close any existing command prompt windows and open a new one. This ensures the PATH changes take effect.
- Verify the Ruby installation by running:
1
2
 ruby -v
 gem -v
- Now, install Bundler, which manages your project’s Ruby dependencies (gems)
1
gem install bundler - The output should look something like this:
1
2
3
4
5
6
7
8
9
10
11
12
13
14
  C:\Users\username>ruby -v
  ruby 3.4.2 (2025-02-15 revision d2930f8e7a) +PRISM [x64-mingw-ucrt]

  C:\Users\username>gem -v
  3.6.2

  C:\Users\username>gem install bundler
  Successfully installed bundler-2.6.6
  1 gem installed

  # You might see a message about updating RubyGems like below.
  # It's generally safe to ignore this for now, but you can update later if needed.
  A new release of RubyGems is available: 3.6.2 → 3.6.6!
  Run gem update --system 3.6.6 to update your installation.
✨ Start Customizing and Previewing Your Blog!
- Configure Your Site in _config.yml: Open the _config.yml file located in your project’s root directory using a text editor. This file contains the main configuration for your Jekyll site. You’ll need to customize several settings. Refer to your chosen theme’s documentation for all available options, but here are some common ones (using Chirpy as an example - you can see the effect on my blog)
lang: en(Site language)timezone: Asia/Shanghai(Your local timezone)title: Kay's Void(Your blog’s title)tagline: Digital Hideout(A short description)url: "https://kay-a11y.github.io"(The final URL where your blog will be live)- GitHub username configuration:
1
2
  github:
    username: kay-a11y
- theme_mode: dark (make it default then you can have both light and dark mode, but I love dark anyway lol)
- baseurl: “” (Important: For a user/organization site named
<YOUR_USERNAME>.github.io, this must be an empty string"".) - Excluding files from the build (add custom ones if needed):
1
2
3
4
5
6
  exclude:
      - "*.gem"
      - "*.gemspec"
      # ... other defaults ...
      - "package*.json"
      - assets/feed.xml # <--- I added this to prevent the feed.xml conflict I met before
- Install Dependencies and Run the Local Server:
- Open a command prompt in your project’s root directory (the one containing
_config.ymlandGemfile). - Run
bundle install. This command reads theGemfileand installs all the necessary Ruby gems (dependencies) for Jekyll and your theme into thevendor/bundledirectory (usually). - Run
bundle exec jekyll serve --livereload. This command builds your Jekyll site and starts a local web server. The--livereloadflag is very helpful as it automatically rebuilds the site and refreshes your browser whenever you save changes to your project files.
- Open a command prompt in your project’s root directory (the one containing
📑 Post Formatting Basics
Creating blog posts in Jekyll follows specific conventions. Your chosen theme might also offer additional helpful Front Matter options (aka the metadata at the top of your post).
- File name(Crucial)
- All post files must reside in the
_postsdirectory - File name format must follow
YYYY-MM-DD-your-post-title.md, e.g.,2025-03-31-heya-world.md
- All post files must reside in the
- File Content: Front Matter + Markdown
- Every post file must start with Front Matter, which is YAML metadata enclosed between triple-dashed lines (
---). - Following the Front Matter, you write the main content of your post using standard Markdown.
- Every post file must start with Front Matter, which is YAML metadata enclosed between triple-dashed lines (
Example structure:
1
2
3
4
5
6
7
8
9
10
11
12
13
14
15
16
17
18
19
20
21
22
23
24
25
26
27
28
29
30
31
32
33
---
# --- Required Front Matter ---
title: "Your Awesome Post Title"
date: YYYY-MM-DD HH:MM:SS +/-TTTT # Use the full date, time, and timezone offset for accuracy
# Example: 2025-03-31 14:30:00 +0800
# --- Optional Front Matter (Theme-specific examples from Chirpy) ---
categories: [Tech, Setup] # Assign categories
tags: [Jekyll, Beginner, Guide] # Assign tags
# Chirpy feature:image path prefix
# if you set to /assets/img/posts/my-first-post/
# then you can use 
# instead of 
img_path: /assets/img/posts/
pin: true # If the theme supports pinning posts to the top
toc: true # Enable Table of Contents generation (if supported)
comments: true # Enable comments section (if integrated)
---
# Post Body Begins Here (Standard Markdown)
## This is a Heading
This is a paragraph with some *italic* and **bold** text.
* A list item
* Another list item
An example of `inline code`.
😎 DONE! Ready to Preview
The successful respond for command bundle exec jekyll serve --livereload would like this:
1
2
3
4
5
6
7
8
9
10
11
12
13
14
15
E:\kay-a11y.github.io>bundle exec jekyll serve --livereload
E:/Ruby/Ruby34-x64/lib/ruby/gems/3.4.0/gems/jekyll-4.4.1/lib/jekyll.rb:26: warning: logger was loaded from the standard library, but will no longer be part of the default gems starting from Ruby 3.5.0.
You can add logger to your Gemfile or gemspec to silence this warning.
Configuration file: E:/kay-a11y.github.io/_config.yml
            Source: E:/kay-a11y.github.io
       Destination: E:/kay-a11y.github.io/_site
 Incremental build: disabled. Enable with --incremental
      Generating...
                    done in 1.663 seconds.
 Auto-regeneration: enabled for 'E:/kay-a11y.github.io'
E:/Ruby/Ruby34-x64/lib/ruby/3.4.0/win32/registry.rb:2: warning: fiddle/import is found in fiddle, which will no longer be part of the default gems starting from Ruby 3.5.0.
You can add fiddle to your Gemfile or gemspec to silence this warning.
LiveReload address: http://127.0.0.1:35729
    Server address: http://127.0.0.1:4000/
  Server running... press ctrl-c to stop.
Now, open your web browser and navigate to http://127.0.0.1:4000/ (or whatever Server address is shown). You should see your blog running locally! Any changes you save to your project files (posts, layouts, CSS, etc.) should automatically trigger a rebuild, and your browser page will refresh thanks to LiveReload.
Happy blogging! 👾
